Tinted windows don’t just elevate the look of your car or home—they also protect you from harmful UV rays, reduce glare, and boost privacy. But without proper cleaning, that sleek finish can quickly degrade. At Quality Tint Works, we’re committed to helping you keep your tinted windows in top condition.
Here’s a complete guide on how to clean tinted windows safely and effectively.
Why Proper Cleaning Is So Important
Tinted windows require special care. If cleaned improperly, they can suffer from:
- Scratches and scuffs that ruin the tint’s smooth surface
- Discoloration caused by harsh or chemical-based cleaners
- Peeling or bubbling around the edges due to excess moisture
- Shortened lifespan of the tint film itself
Avoiding these issues starts with the right materials and techniques.
What You’ll Need
To clean tinted windows without damaging them, gather the following:
- Ammonia-free glass cleaner (or a homemade solution of mild dish soap and distilled water)
- Microfiber cloths – soft, lint-free, and gentle on tint
- Spray bottle – for controlled application
- Rubber squeegee – optional, but useful for streak-free drying
- Distilled water – prevents hard water spots
How to Clean Tinted Windows: Step-by-Step
1. Choose the Right Time of Day
Avoid cleaning tinted windows in direct sunlight or on hot surfaces. Early morning or evening is ideal to prevent streaks and rapid drying.
2. Dust First
Use a dry microfiber cloth to gently wipe away dust or debris from the glass before applying any liquid. This step helps prevent scratches during cleaning.
3. Mix or Choose Your Cleaning Solution
If you’re not using a commercial ammonia-free glass cleaner, mix a few drops of mild, non-abrasive dish soap with distilled water in a spray bottle.
4. Spray the Cloth, Not the Window
Spray your cleaning solution directly onto your microfiber cloth, not onto the window. This prevents the solution from seeping into the edges of the tint film.
5. Wipe Gently in Straight Lines
Using light pressure, wipe the window in a single direction—either vertically or horizontally. Avoid circular motions, which can create swirls or streaks.
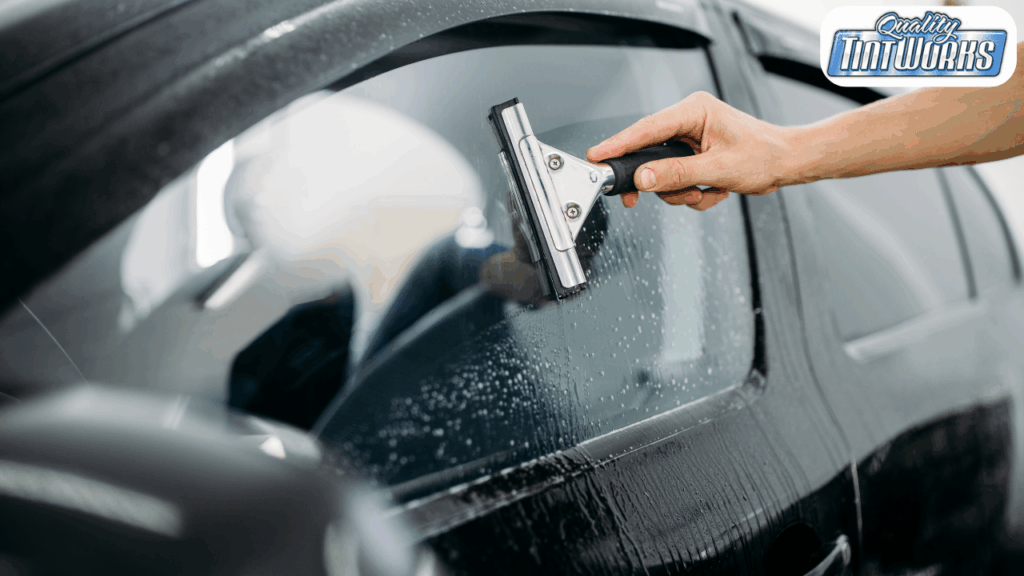
6. Dry the Surface Immediately
Use a clean, dry microfiber cloth or a squeegee to dry the window and remove any remaining solution. This helps prevent water spots or streaking.
Things You Should Never Do
Many people unknowingly damage their tint during cleaning. Here’s what to avoid:
- Never use ammonia-based products – They break down the tint film and cause fading.
- Skip paper towels – They leave lint behind and may scratch the surface.
- Avoid abrasive sponges or scrubbers – These can cause permanent damage.
- Don’t use too much liquid – Excess moisture near window edges can cause tint peeling.
- Avoid cleaning when it’s hot – Heat causes cleaning solutions to evaporate too quickly, leaving behind streaks.
Maintenance Tips for Long-Lasting Tint
- Clean regularly: Every 2–4 weeks is ideal to prevent dirt and residue buildup.
- Park in the shade: It helps reduce heat buildup that can affect tint longevity.
- Watch for signs of wear: Bubbles, peeling, or edge lifting? It’s time for professional help.
- Use window visors: Especially in cars, they reduce UV exposure and interior heat.
Trust the Professionals at Quality Tint Works
At Quality Tint Works, we don’t just install tints—we help you maintain them. Whether you’re looking for automotive, residential, or commercial window tinting, we provide professional results and care guidance to extend the life of your tint.
Need help with a damaged tint or want expert installation?
Contact us today—we’re here to keep your view clean and clear.